I recently went to the ICA and got to see the Mark Bradford exhibit. It got me excited about the idea of introducing map imagery to paintings using resist techniques. I first tried cutting masking tape into little "blocks" and placing them in city-like formations, but it didn't work too well. Not only was it a bit too difficult to place them accurately, but they didn't actually resist water fully enough, and it was hard to get them into a shape that read as a city and not just a grid. They kept reminding me of old-style telephone keypads.
Watercolor wash over tape:
After removing tape:
Then I tried using some watercolor masking fluid I had used for things like clouds in an earlier series. Because the fluid dries into rubber so quickly, it was hard to paint fine enough lines, so the effect was more like batik than the spindly city lines I'm more used to. If I could get finer lines, though, I think it would be effective, since it did resist the watercolor very well.
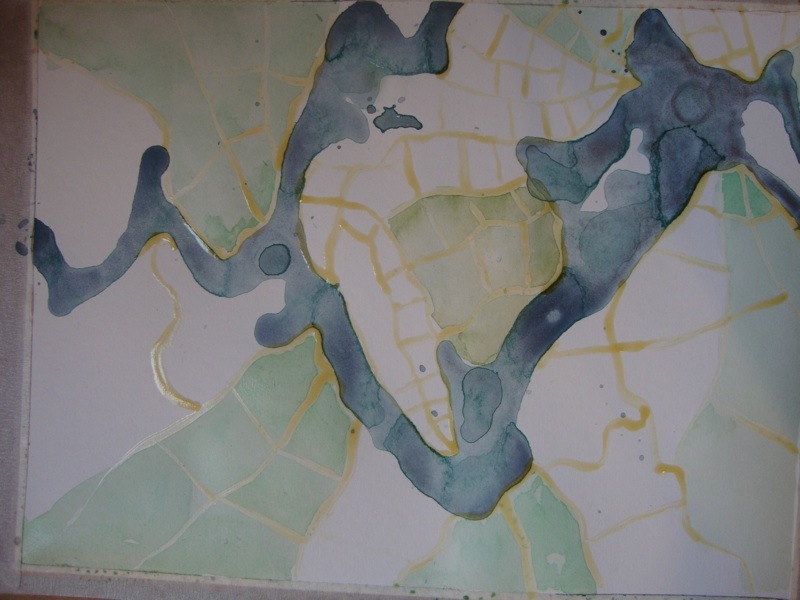
For the next one I started by putting down rivers of blue wash, and then drew the roads around them and painted "neighborhoods" of blocks using successive washes of green and brown. Once I was done painting, the original blue shapes were almost gone, but when I removed the dried masking fluid the river boundaries thus revealed helped to bring back the overall shape of the river. I like how that worked a lot, because the organic origins of city plans is something I'm always interested in conveying.
I would probably want to continue by making a larger version of the last experiment, with a finer brush. Any other ideas for things I should try?